Creating and Managing Lists in Account Studio
Last updated: April 6, 2026
This is an enterprise-only feature. Interested in upgrading to an enterprise plan? Email the team at mutinylovesyou@mutinyhq.com to get plan upgrade information.
Account Studio provides a powerful interface for creating targeted account lists using advanced filtering, CSV data, and sophisticated list management tools.
Creating a New List
Navigate to Account Studio from the left navigation
Use the filter panel to define your audience criteria
Save your list when ready
Advanced Filtering System
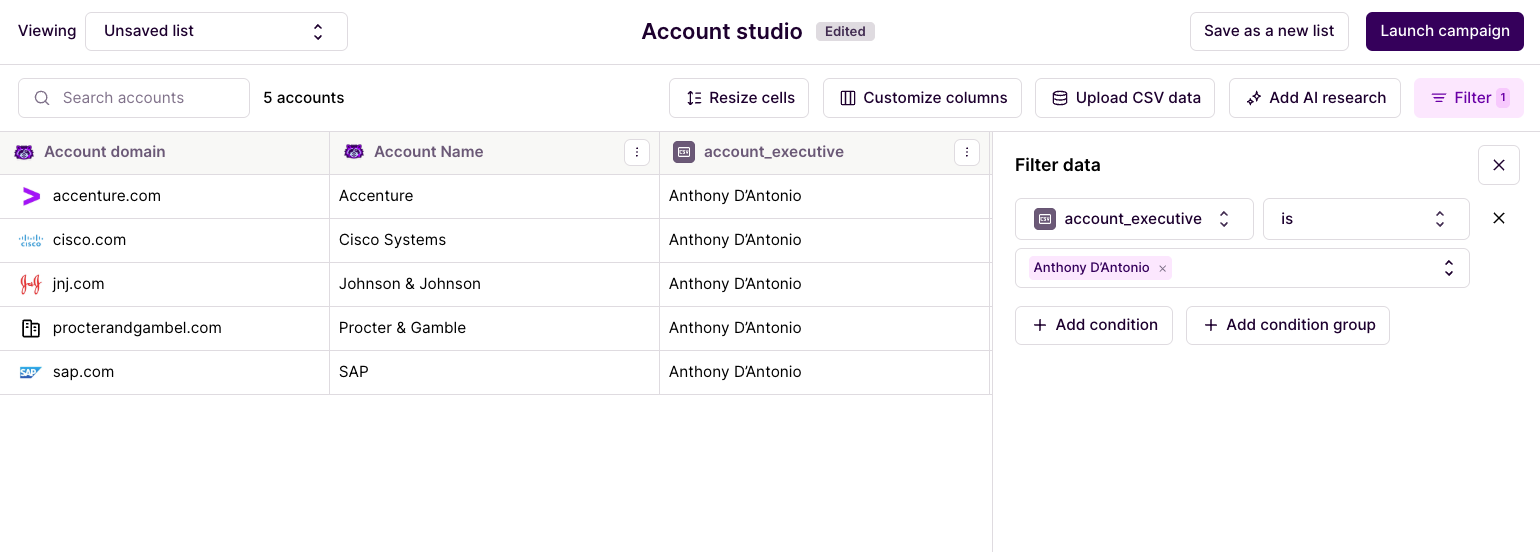
Account Studio features a powerful filtering system that supports both AND and OR conditions, as well as condition groups for complex logic.
Filter Types Available:
Exists/Does Not Exist: Check if a field has any value
Contains: Search for specific text within fields
Equals/Does Not Equal: Exact matches
Greater Than/Less Than: Numerical comparisons
Date Ranges: Filter by time periods
Using Condition Groups
You can create sophisticated filter logic by grouping conditions:
Click "Add Condition Group" to create nested logic
Use AND/OR operators between groups
Combine multiple condition groups for complex targeting
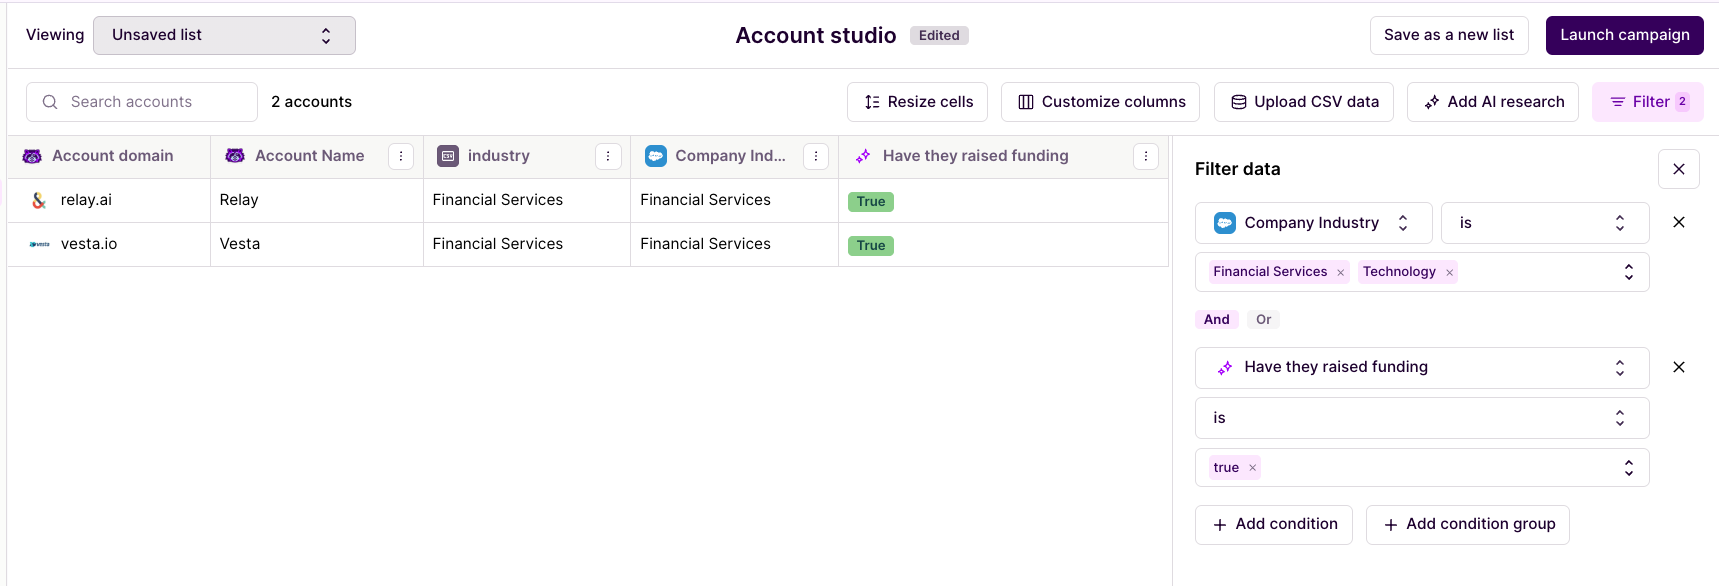
Example: Target accounts in Financial Services OR Technology industries AND have raised funding in the last 6 months.
Real-Time List Updates
As you add filters, Account Studio automatically:
Updates your account count in real-time
Shows relevant columns for your filters
Displays a preview of matching accounts
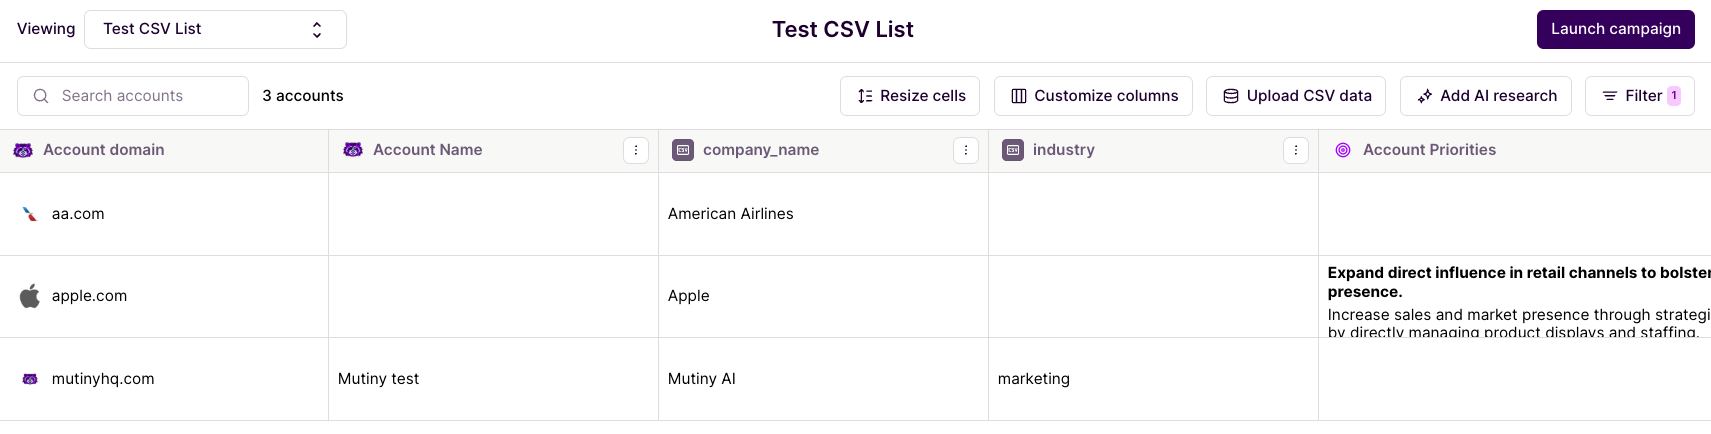
CSV Data Management
Uploading CSV Data
Account Studio provides an improved CSV upload experience with better data management and conflict resolution.
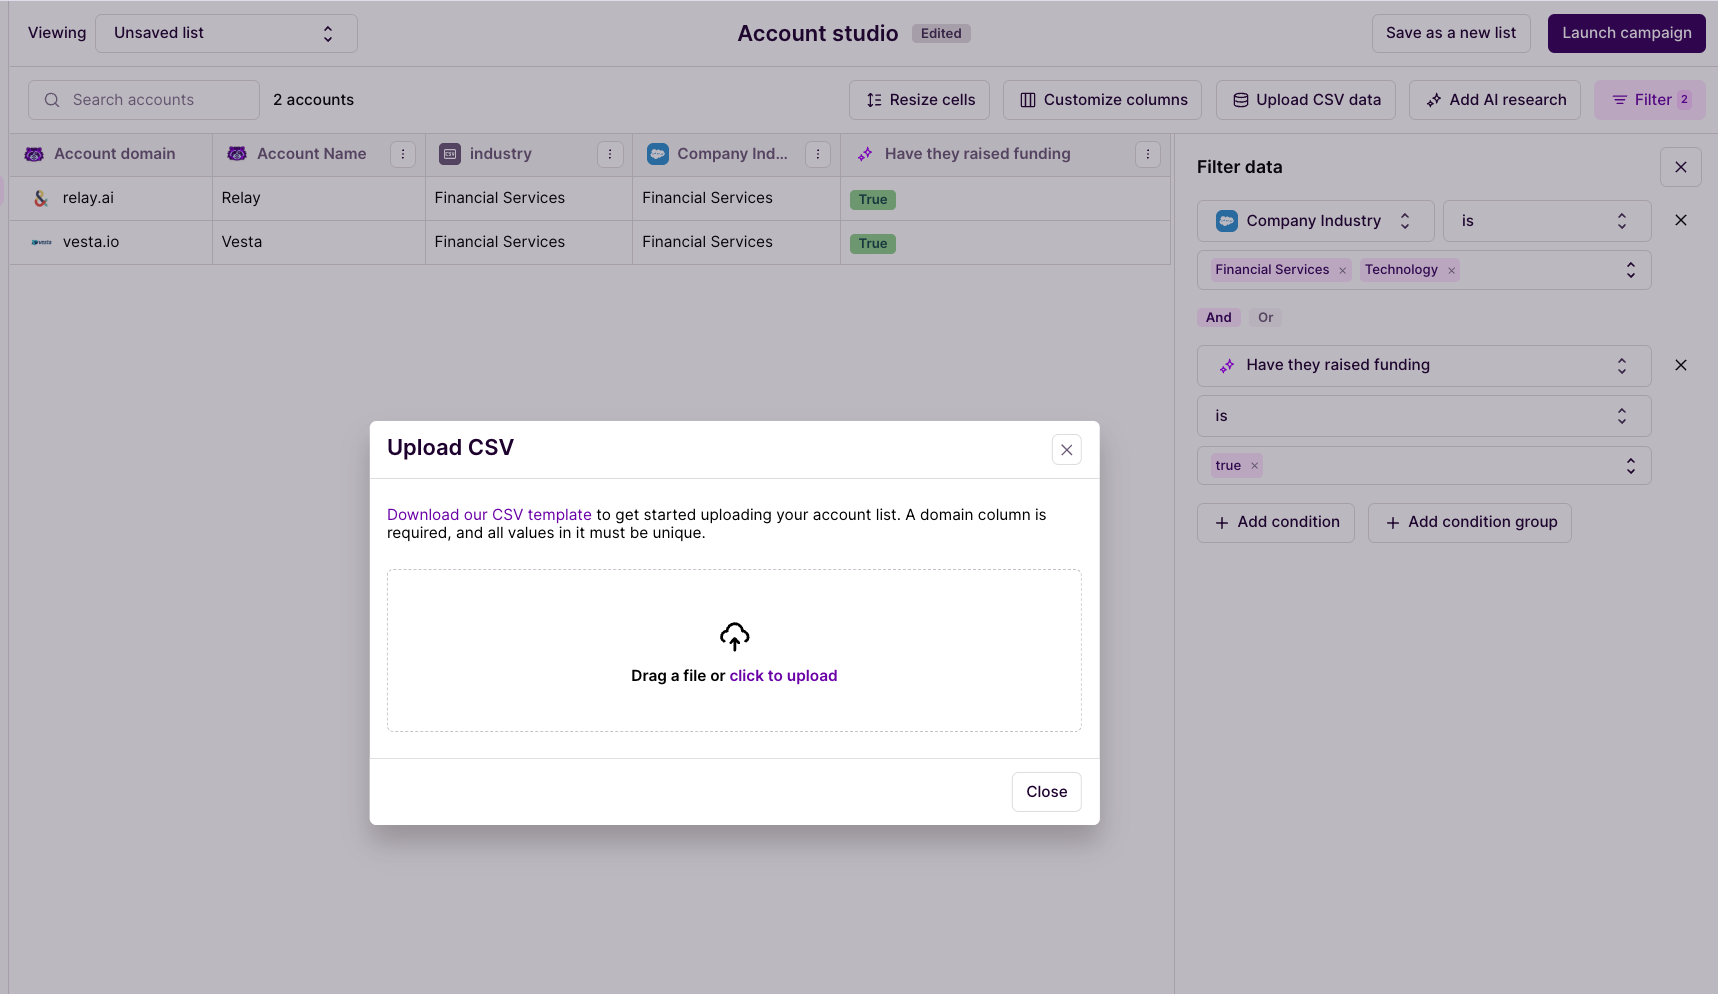
Upload Process:
Select CSV File: Choose your file for upload
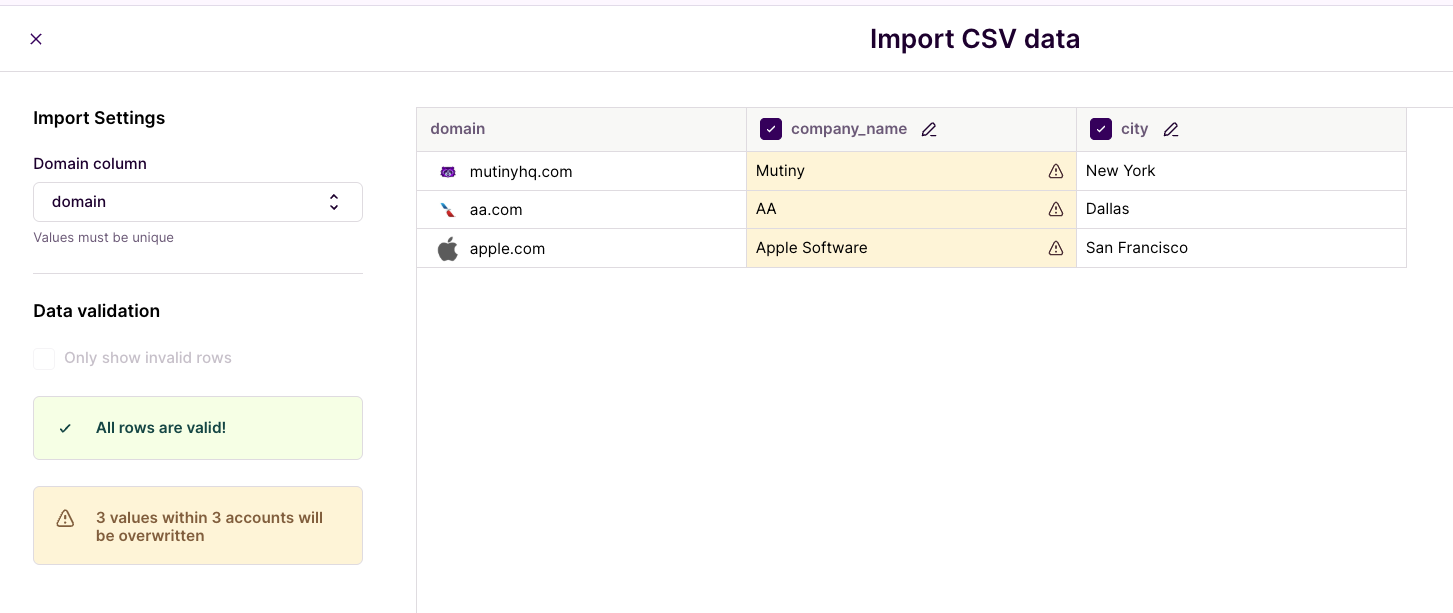
Map Columns: Review and rename columns before completing upload
Review Overwrites: See which existing data will be updated
Complete Upload: Confirm your data upload
Managing Data Conflicts
Column Naming: Rename columns during upload to avoid conflicts with existing data sources.
Overwrite Prevention: The system shows you which values will be overwritten, allowing you to:
Choose unique column names
Decide whether to proceed with overwrites
Understand data source conflicts
Working with CSV-Based Lists
When you create a list from uploaded CSV data, Account Studio displays:
Data Source: Shows which user uploaded the data
Filter Context: Indicates the list is based on CSV data
Additional Filtering: Add more criteria on top of CSV data
Combining Multiple CSV Sources
You can create lists that combine data from multiple CSV uploads:
Use OR conditions to include accounts from different uploads
Filter by specific CSV sources
Combine CSV data with CRM and enrichment data
Data Sources and Priority
Understanding Data Sources
Account Studio works with data from multiple sources, and you can choose which source to use for filtering:
Source-Specific Fields: Select "Salesforce Account Name" vs "HubSpot Account Name"
CSV Sources: Choose specific CSV uploads by name
Integration Data: Use data from connected platforms
Data Source Priority
When the same field exists across multiple sources:
Most Recent Data: Newer data typically takes precedence
Source-Specific Selection: Choose specific data sources when creating lists
Integration-Specific Fields: Select the exact source you want
Note: CSV uploads will overwrite the Mutiny value for the field. It will not overwrite the field value for all data sources.
List Management and Organization
Saving Lists
Save Options:
Save: Update existing list with current filters
Save As: Create new list with different name (acts as duplicate function)
List Organization:
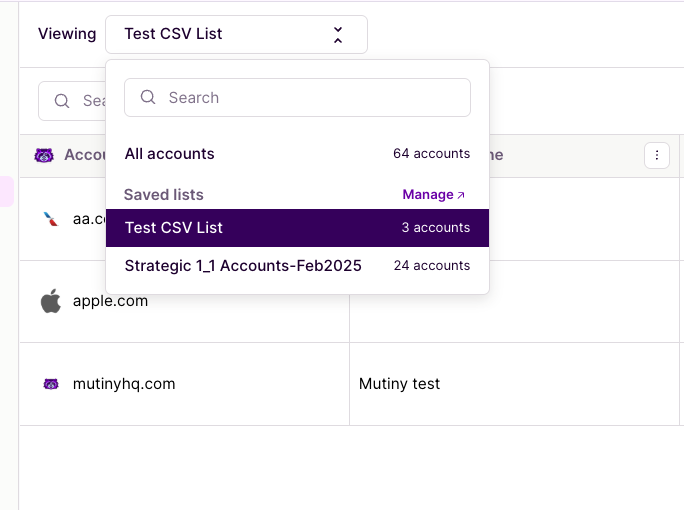
Recent Lists: Quick access to your 5 most recent lists
Search: Find lists by name in the dropdown
Archive: Remove outdated lists from active use
Managing Existing Lists
List Actions Available:
Edit: Modify filters and criteria
Rename: Update list names for better organization
Archive: Remove lists from active use
Delete: Permanently remove lists
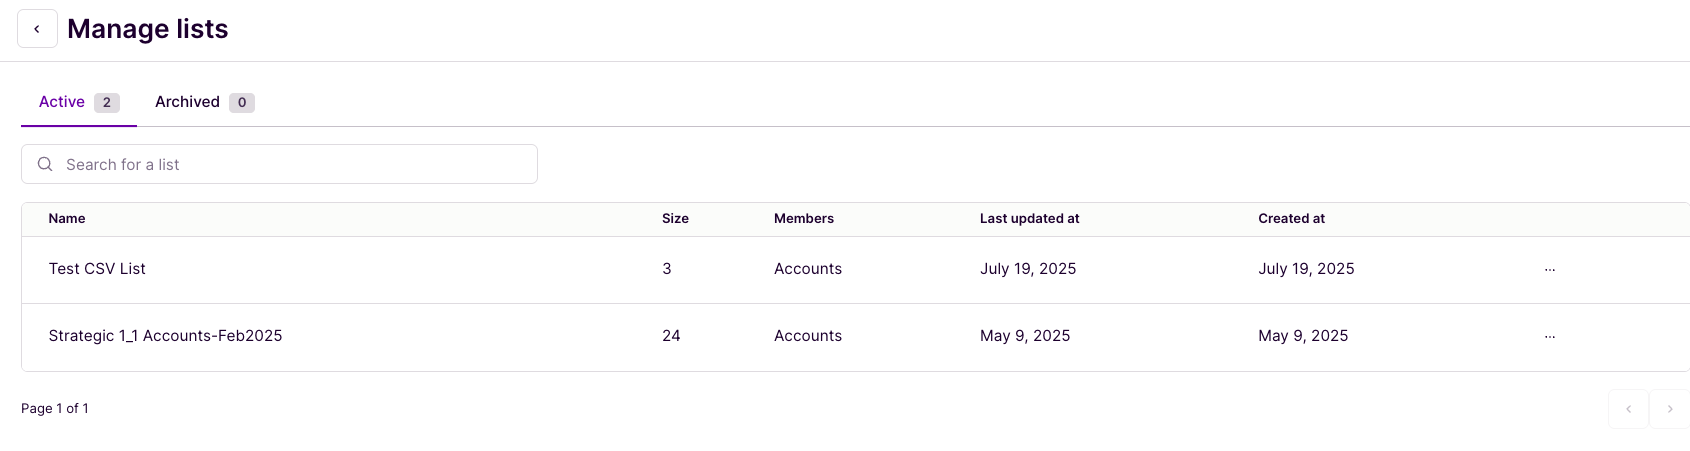
List Management Interface
Access your saved lists through:
Recent Lists Dropdown: Shows 5 most recently accessed lists
Manage Lists: Full list management interface
Search: Find specific lists by name
Dynamic Column Display
Account Studio automatically shows relevant data as you build your list:
Real-time Updates: Columns appear as you add filters
Customizable View: Choose which columns to display
Column Resizing: Adjust column widths for better viewing
Column Reordering: Drag and drop columns to reorganize
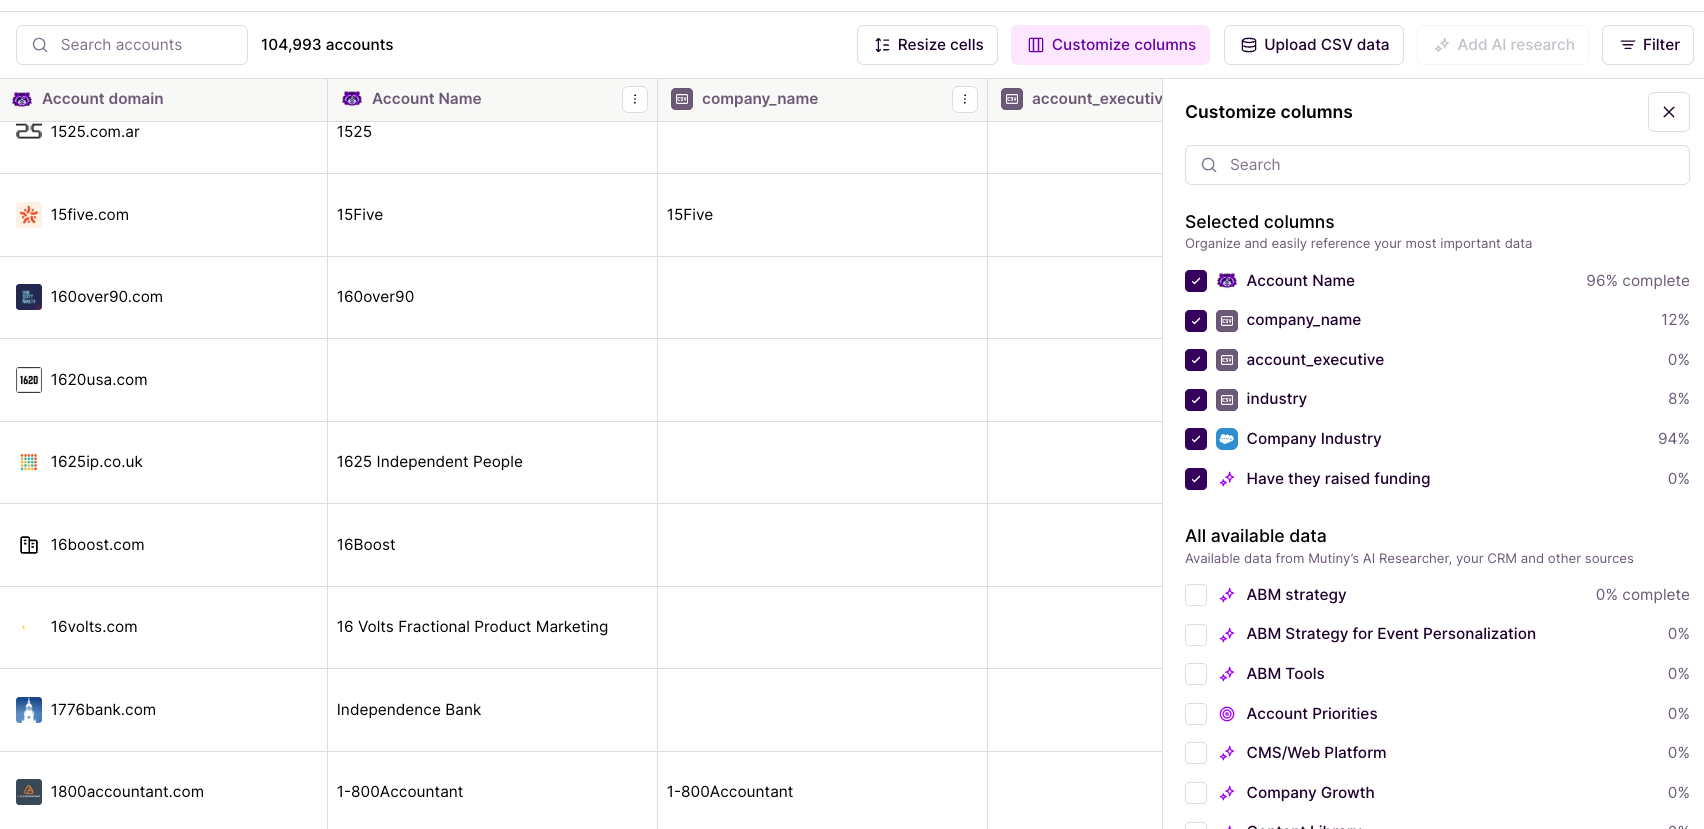
Customizing Your View
Customize Columns: Select which data fields to display
Resize Columns: Adjust widths for optimal viewing
Reorder Columns: Drag to rearrange column order
Hide/Show Columns: Remove unnecessary data from view
Best Practices
List Organization
Use descriptive names that reflect your targeting criteria
Include dates in time-sensitive list names
Archive outdated lists to keep your workspace clean
Filtering Strategy
Start with broad filters and narrow down
Use condition groups for complex logic
Test filter combinations with preview mode
Data Management
Rename CSV columns to avoid conflicts
Use unique identifiers when uploading multiple CSV files
Regularly review and clean up unused data sources
Next Steps
After creating your list in Account Studio:
Add AI Research: Enrich your accounts with custom insights
Schedule Updates: Plan regular list maintenance
Share Lists: Coordinate with team members using shared lists
For more information on adding AI research to your lists, see AI Research and Data Enrichment in Account Studio.
Need help?
If you have questions or need help, the Mutiny Support team is here for you! You can submit a support ticket using the Submit a ticket button at the top of this page, or reach us at support@mutinyhq.com.